Frigate changed how I think about home security. Instead of paying Ring or Google Nest monthly fees for cloud recording and AI detection, I now run everything locally on a machine I control. The setup took an afternoon, and it's been rock solid for six months.
If you've been thinking about moving away from cloud-based camera systems, Frigate is the answer. Here's how to get it running.
Get a Coral USB Accelerator on Amazon
Why Frigate Matters
Cloud camera services are convenient, sure. Ring shows you notifications, Nest records everything, Google clips important moments. But you're paying for that convenience—usually $10-30 per month per camera. Over time, that adds up. More importantly, your footage goes to someone else's server.
Frigate runs locally on your Home Assistant machine. The AI detection happens on your hardware. You choose what to record, how long to keep it, and who sees it. There's no subscription. There's no cloud upload unless you explicitly set it up.
The AI detection is actually smarter than what cloud services offer. Frigate uses YOLO and other open-source models that can distinguish between a person, a car, a dog, and a package. You get alerts for the things you actually care about, not just "motion detected."
Hardware You'll Need
This is where people get nervous, but it's not complicated.
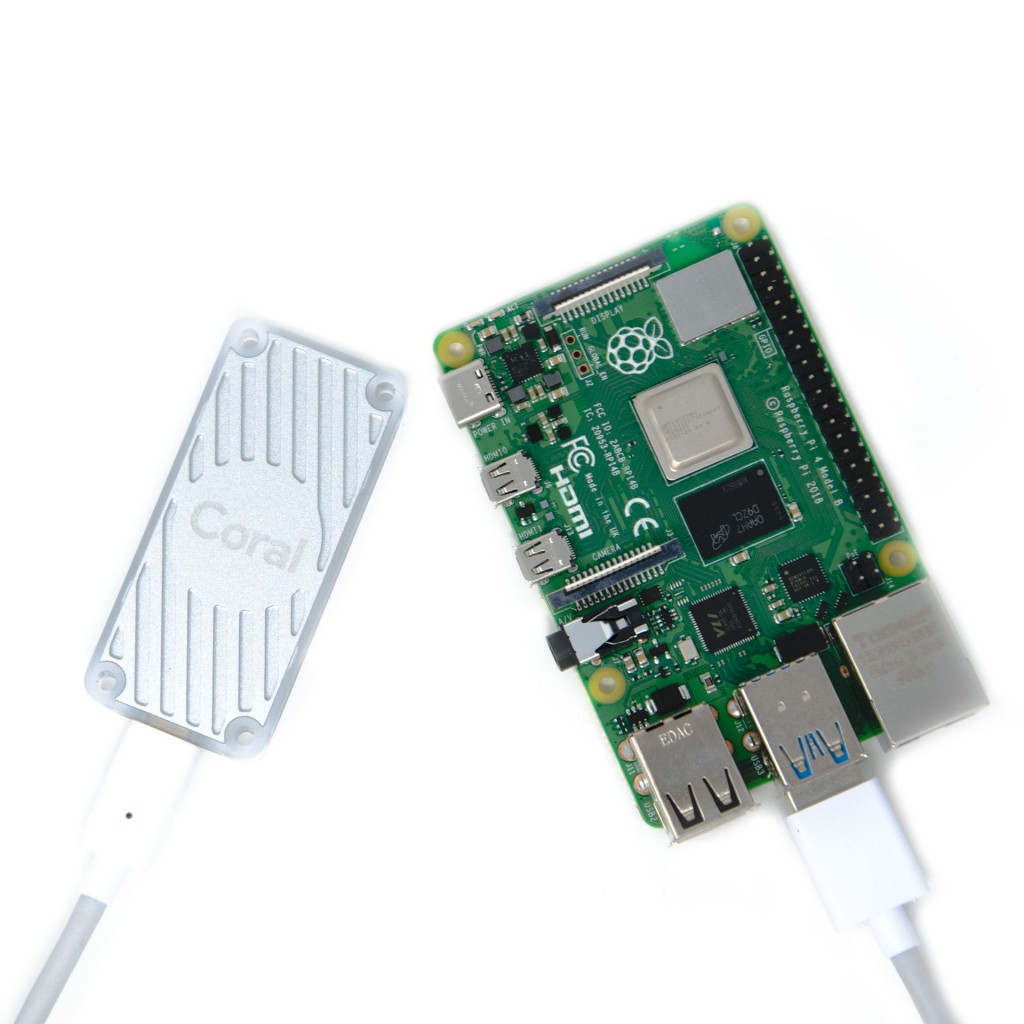
Home Assistant Instance: Frigate runs as an add-on within Home Assistant. You need a decent machine—not a Raspberry Pi 4 anymore. I use an Intel N100 mini PC (around $200-300), which handles four 2K cameras, AI detection, and recording without breaking a sweat. The N100 is efficient, quiet, and overkill for most setups. A used Intel NUC would work fine too.
Coral USB Accelerator: This is optional but highly recommended. It's a small USB stick ($25-35) that handles the AI detection processing. Without it, your Home Assistant machine works harder and uses more power. With it, detection is instant. Frigate will work without it, but you'll notice the lag on alerts.
IP Cameras: Standard PoE (Power over Ethernet) security cameras are what you want. I use Reolink cameras across my property—they're reliable, work great with Frigate, and don't require subscriptions. Get something with at least 2K resolution. 4K is nice but uses a lot of storage.
Storage: Frigate needs to store video. A fast USB SSD (500GB minimum, 1TB better) works well. A dedicated NAS is even better if you're keeping months of footage. Budget storage based on your camera count and retention policy. Four cameras recording 24/7 at 2K needs about 500GB per week.
Network: PoE IP cameras need a proper network setup. You'll want a PoE switch or injectors to power the cameras through ethernet. Standard home routers aren't ideal for this many devices—I use a decent managed switch to keep things clean and reliable.
Prerequisites Before You Start
Get these running first.
Mosquitto MQTT Broker: Frigate uses MQTT to communicate status to Home Assistant. Install the Mosquitto add-on from the Home Assistant add-on store. It's one click. No configuration needed—default settings work fine.
HACS (Home Assistant Community Store): You'll need HACS installed to grab the Frigate integration. Go to Home Assistant settings, add HACS from the custom repositories, and install it. It's the standard way to add community integrations.
Your Home Assistant Instance: Make sure it's updated to the latest version. Frigate works with recent Home Assistant versions, but old installs sometimes have compatibility issues.
Once those are running, you're ready for Frigate.
Step 1: Install the Mosquitto Add-on
Home Assistant settings → Add-ons → Create your own add-on repository → Search for "Mosquitto" → Install
Start the add-on. That's it. MQTT is now running and ready.
Step 2: Install Frigate Add-on
Home Assistant → Settings → Add-ons → Add-on Store → Search for "Frigate NVR"
Install the Frigate add-on. During installation, it'll ask for some configuration. Don't worry—you can adjust everything later.
Once installed, click "Start" to fire it up. The first launch takes a few minutes as it downloads dependencies. Wait for the logs to settle.
Step 3: Configure frigate.yml
This is where the real setup happens. The Frigate add-on includes a file manager. Go to the Frigate folder and open frigate.yml.
Here's a basic starting template:
mqtt:
  host: localhost
  port: 1883

cameras:
  front_door:
    ffmpeg:
      inputs:
        - path: rtsp://username:password@camera-ip:554/stream
          roles:
            - detect
            - record
    detect:
      width: 1280
      height: 720
    objects:
      track:
        - person
        - car
        - dog

detectors:
  coral:
    type: edgetpu
    device: usb

snapshots:
  enabled: true
  retain:
    default: 10

record:
  enabled: true
  retain:
    days: 7
Replace front_door with your camera name. Find your camera's RTSP stream URL (usually in the camera's documentation or settings). Adjust the detect resolution based on what your hardware can handle.
The track list tells Frigate which objects trigger alerts. If you only care about people, just list person. Add more as needed.
The retain settings control how long Frigate keeps footage. Seven days of 2K recording needs less than 100GB. Adjust based on your storage.
Step 4: Install Frigate Integration via HACS
HACS → Integrations → Search "Frigate" → Install the Frigate integration → Restart Home Assistant
Once Home Assistant restarts, the Frigate integration loads automatically and discovers your cameras.
Step 5: Set Up the Advanced Camera Card
Home Assistant's default camera card is basic. The Advanced Camera Card from HACS gives you much better visualization of Frigate's detection.
HACS → Frontend → Search "Advanced Camera Card" → Install
Add this to your dashboard:
type: custom:frigate-card
cameras:
  - camera_entity: camera.front_door
    frigate:
      camera_name: front_door
live_provider: frigate
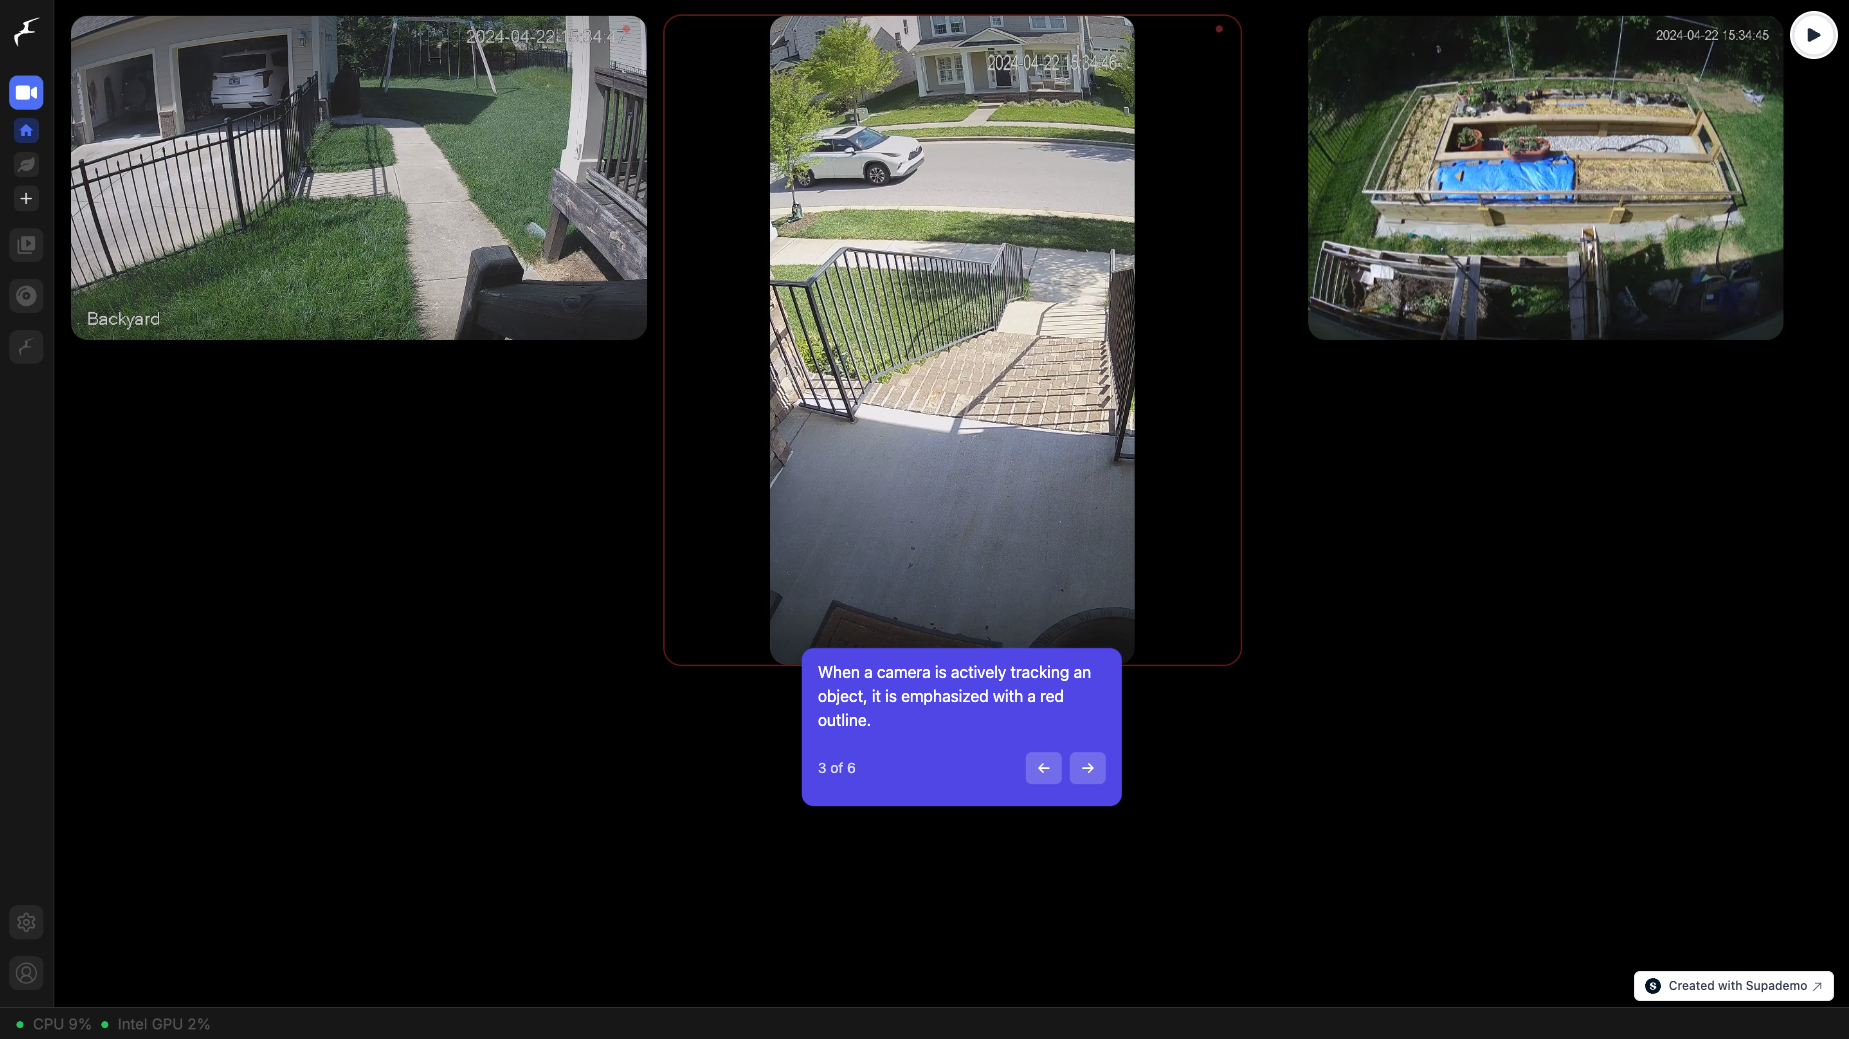
Now you've got a dashboard showing live cameras with detection zones and clip access.
Camera Placement and Detection Zones
Where you point your cameras matters. For front entries, point at the door, walkway, and porch. For side yards, aim at gates or property lines.
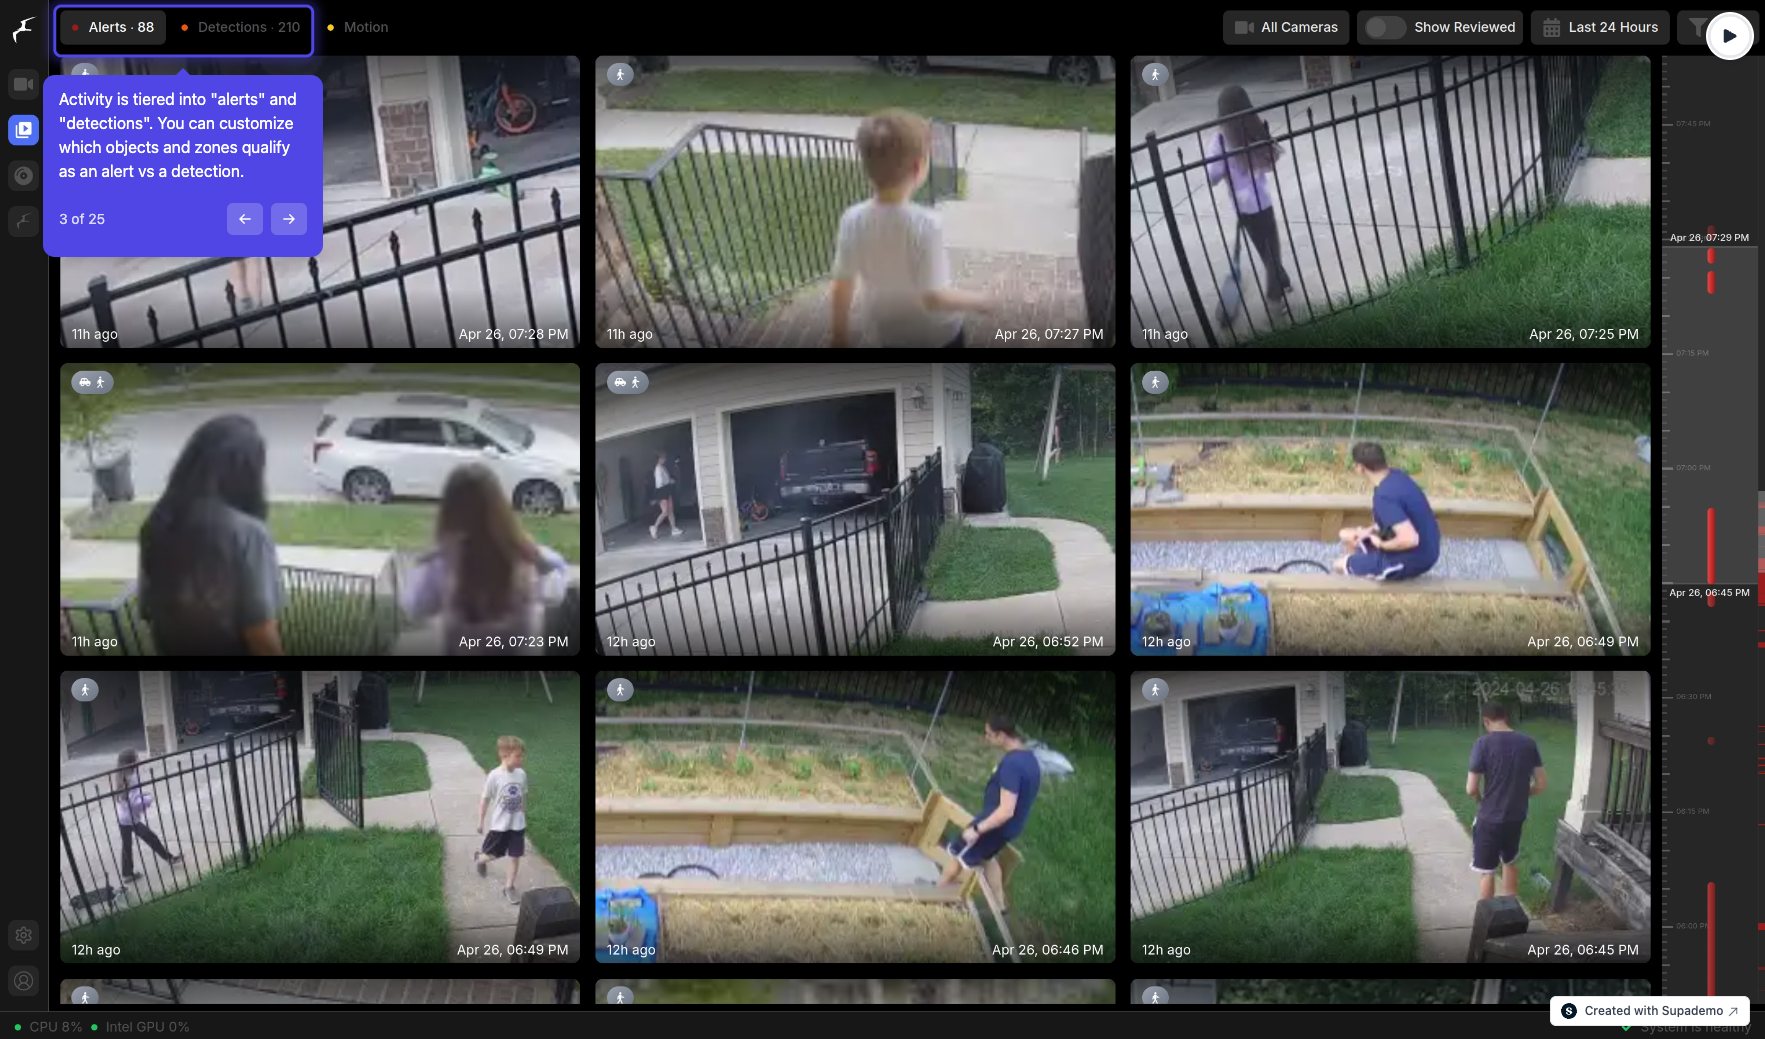
Detection zones prevent false alerts. In the Frigate web interface, you can draw zones and tell Frigate which areas to monitor for detection. I use this to ignore passing traffic on the street while monitoring my actual property.
The zone editor is intuitive—just draw rectangles on the camera feed where detection matters.
Fine-Tuning Detection
Frigate's defaults work well, but you can adjust:
- Minimum object confidence: How certain Frigate needs to be before reporting a detection. Lower = more alerts but fewer misses. Higher = fewer alerts but might miss things.
- Detection timeout: How long an object needs to be present before triggering an alert.
- Required zones: Set detection to only trigger when objects are in specific zones.
Start with defaults. Tune based on false alerts you actually get.
Automations and Alerts
Once Frigate is running, you can build automations in Home Assistant. When a person is detected:
- Send a notification
- Turn on lights
- Start recording longer clips
- Trigger your alarm system
Example automation:
automation:
  - alias: "Alert on person detection"
    trigger:
      platform: state
      entity_id: binary_sensor.front_door_person
      to: "on"
    action:
      service: notify.mobile_app
      data:
        message: "Person detected at front door"
Storage and Archiving
Frigate creates a lot of footage. Plan for it. A 500GB SSD might get you two weeks of four cameras at 2K. If you want longer retention, invest in a NAS or use an external drive.
You can also set up archival—older footage moves to slower storage automatically. That keeps your fast SSD for recent clips while keeping months of backups.
Why This Beats Cloud Services
You own your footage. No subscription fees. Detection is instant without uploading to the cloud. You can keep months of video without paying monthly storage. The AI runs locally, so privacy is real, not just marketing.
Ring and Nest are convenient, absolutely. But you're trading convenience for cost and control. Frigate asks you to do the setup work once, then gives you total control forever.
Troubleshooting Basics
Cameras won't connect: Check your RTSP URL. Make sure cameras are on the same network. Test the URL in VLC to confirm it works.
AI detection is slow: The Coral accelerator helps dramatically. Without it, expect detection to take a few seconds per frame.
Storage fills up: Adjust your retention policies. Seven days is reasonable. Thirty days needs 2TB for four cameras.
High CPU usage: Lower detection resolution in frigate.yml. Use the Coral accelerator.
The Real Win
After six months of running Frigate, I don't miss the cloud services. I have three months of footage locally. Person detection gets me alerts instantly. I've caught actual problems—a package delivery mixup, suspicious activity that turned out to be my neighbor's contractor—and I've got the evidence locally.
The setup took an afternoon. The maintenance is basically zero. The cost was around $400 up front, and it's paid for itself versus subscription fees.
If you care about home security, privacy, and not throwing money at subscriptions forever, Frigate is worth the effort. The learning curve exists, but it's not steep.