I spent $65 on an Aqara FP2 presence sensor last year. It's great. It detects people from up to six meters away using mmWave radar. But then I realized I could build basically the same thing for fifteen bucks, and I spent a weekend doing exactly that.
Here's the good news: if you can solder three wires, you can build this. No programming required. ESPHome handles all the firmware stuff—you just write a simple YAML config file.
Parts You Need
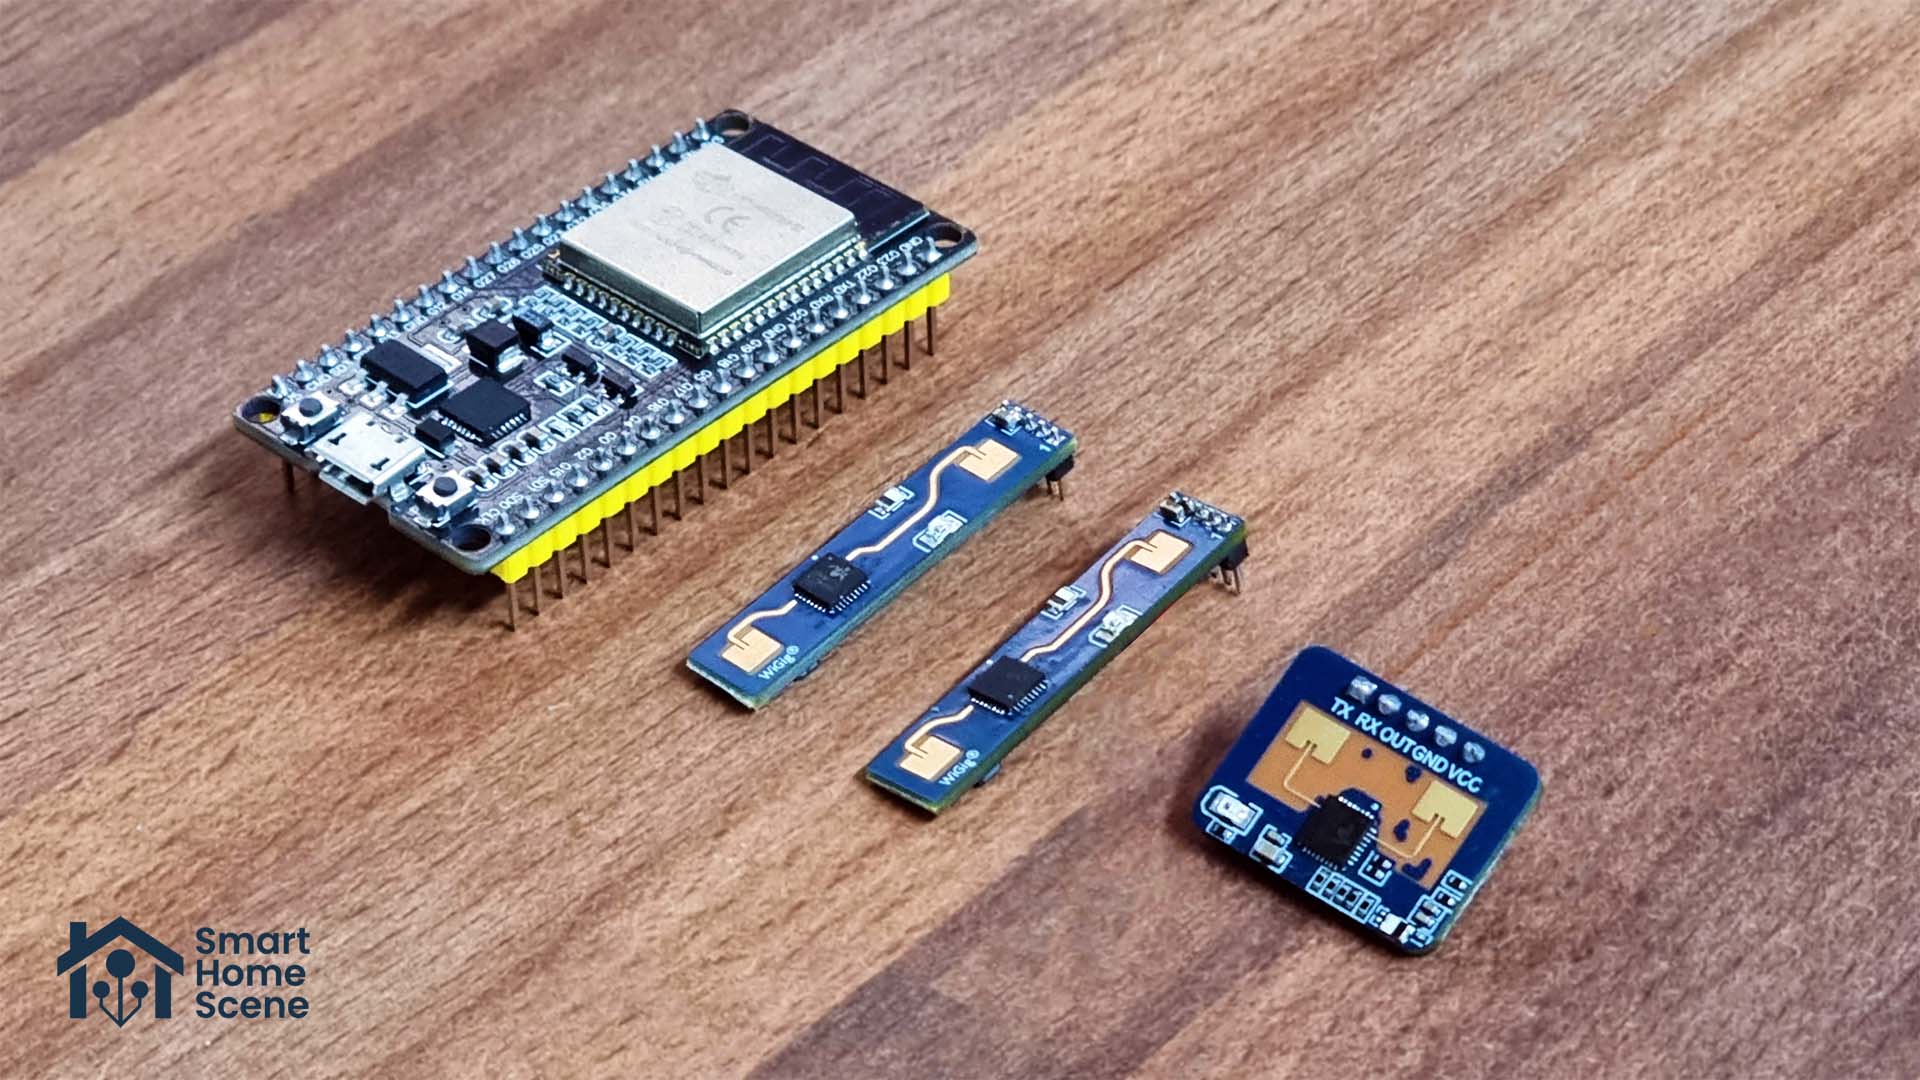
- ESP32-C3 Mini board (~$5) — Cheap, reliable, small enough to hide anywhere
- LD2410B mmWave sensor (~$8) — The magic part that detects presence
- USB-C cable (for flashing) — You probably have one
- Three jumper wires — For connecting the sensor to the board
Total: ~$13 before shipping
That's it. No resistors, no capacitors, no complicated electronics. The LD2410B runs at 5V and communicates via UART, which the ESP32 can handle without any additional components.
You can grab the board from AliExpress or Amazon. The LD2410B comes from the same places. Shipping might take a couple of weeks if you go the AliExpress route, but the price is worth the wait.
Flashing ESPHome to the ESP32
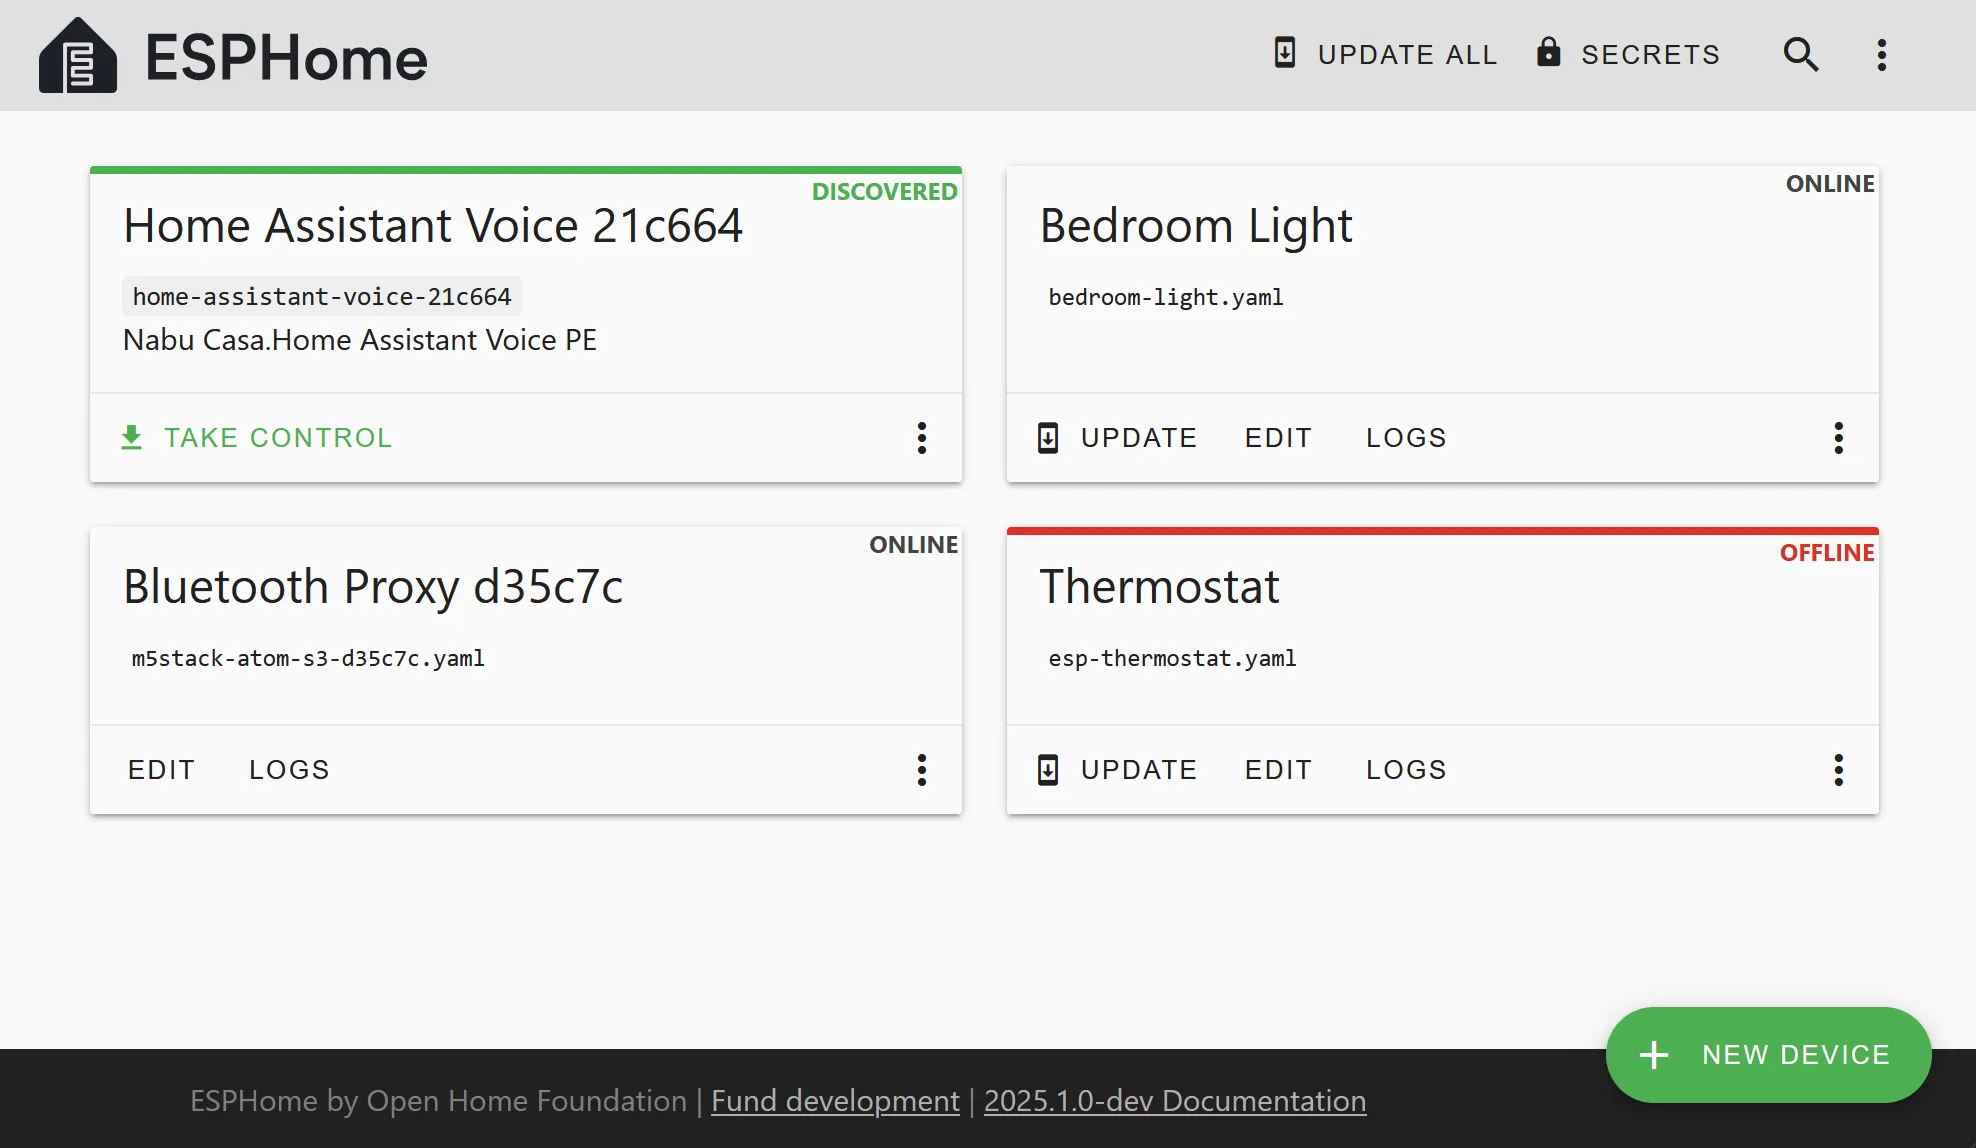
ESPHome is a framework that runs on cheap microcontroller boards like the ESP32. You write a YAML config file describing your device, and ESPHome compiles it into firmware and flashes it to your board.
Go to esphome.io and download the ESPHome desktop app (or use the web version). Create a new project, select ESP32-C3 as your board, and call it something like "room-presence" or "office-sensor."
ESPHome will generate a basic config. Connect your ESP32 to your computer via USB-C. In ESPHome, click the three-dot menu next to your project and select "Install." Choose "Plug into this computer." ESPHome will detect your board, compile the firmware, and flash it. This takes about two minutes.
Once it's flashed, your board connects to your Wi-Fi (ESPHome walks you through that part). You should see it appear in your Home Assistant discovery shortly after.
Wiring the LD2410B
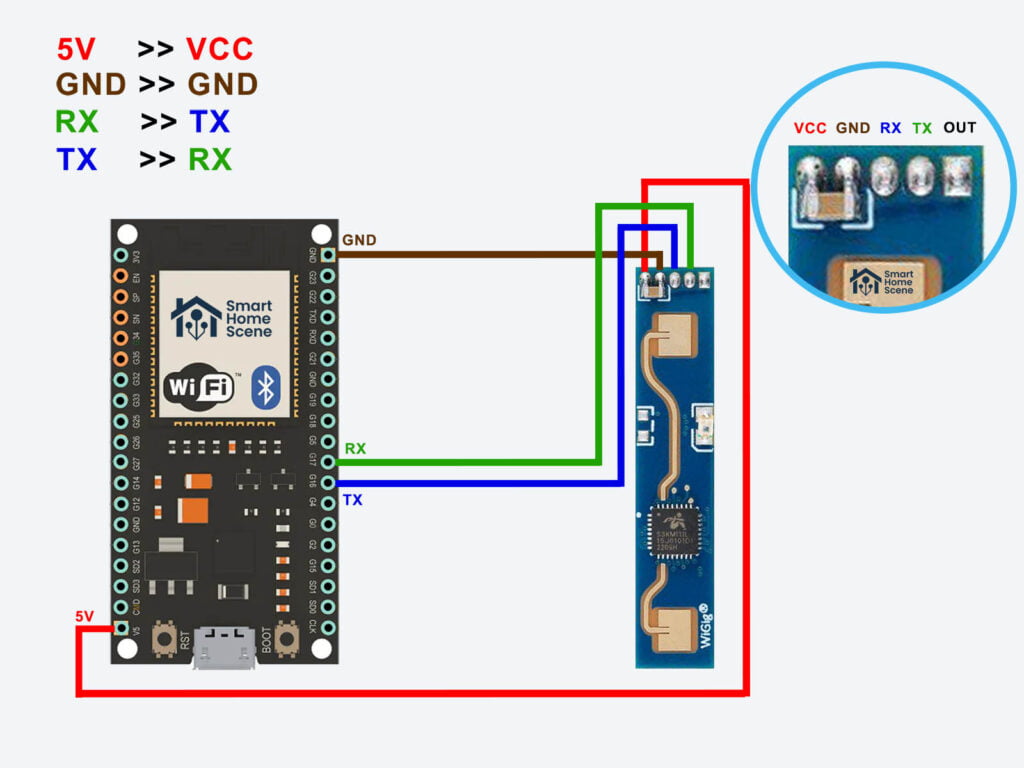
This is the simplest part, but it's the most important. The LD2410B has three wires you care about:
- VCC (red) → 5V on your ESP32
- GND (black) → GND on your ESP32
- TX (yellow/white) → GPIO20 on your ESP32
Solder these three wires to the corresponding pins on your board. If you're new to soldering, there are about a million YouTube videos on how to do it cleanly. The key is using enough flux, not too much solder, and a clean tip on your iron.
Once it's wired, use some hot glue or a small 3D-printed bracket to keep the sensor stable inside your enclosure.
Configuring ESPHome with UART
Now you need to tell ESPHome how to talk to the LD2410B. Go back to your ESPHome project and edit the YAML config.
Add this section:
uart:
  - id: ld2410_uart
    tx_pin: GPIO21
    rx_pin: GPIO20
    baud_rate: 115200

ld2410:
  uart_id: ld2410_uart
  presence_timeout: 10s
The LD2410 communicates over UART at 115200 baud. We're using GPIO20 for RX (receiving data from the sensor) and GPIO21 for TX (sending commands). If you wired TX to a different pin, adjust accordingly.
The presence_timeout determines how long after the sensor stops detecting movement before it reports "no presence." I use 10 seconds, but you can tweak this depending on your room size and how sensitive you want it.
Add this to create a binary sensor for Home Assistant:
binary_sensor:
  - platform: ld2410
    presence:
      name: "Office Presence"
      id: office_presence
Save the config and click "Install" again. ESPHome will recompile the firmware and push it to your board over Wi-Fi this time (no USB needed). You should see a "Presence" entity appear in Home Assistant within a minute.
3D Printing an Enclosure
You don't want to leave a circuit board and radar sensor sitting naked on your shelf. Thingiverse has several ESP32 enclosures designed specifically for the LD2410B. Search for "LD2410B enclosure" and you'll find a bunch of options.
I printed one in PETG, drilled a small hole in the front for the sensor antenna, and called it done. Total print time was about 45 minutes. The sensor sits on my bookshelf pointing across my office, and it detects me the moment I walk in.
How Accurate Is It?
The LD2410B detects motion and stationary human presence up to about six meters away depending on your enclosure and antenna placement. It's not perfect—you'll get occasional false negatives if someone is standing very still, and false positives if a ceiling fan is running nearby. But for home automation, it's solid.
I use it to turn on my desk lamp when I walk in and turn it off when I leave for more than 30 seconds. Works about 95 percent of the time. The 5 percent where it misses is usually when I'm being very still at my desk, and the automation isn't critical anyway.
Why Not Buy Aqara?
The Aqara FP2 is $60 and does roughly the same job. It's plug-and-play, it's made by a serious company, and you get a warranty.
But here's why I love the DIY approach: you own it. You can put it anywhere. You can tweak the sensitivity in YAML. You can add a temperature sensor, or humidity, or a motion detector. You're not dependent on anyone's app or cloud. And when you're done, you've learned something.
Plus, at $15, you can build three of them and scatter them around your home for what you'd pay for one Aqara.
Expanding Your Setup
The LD2410B does motion detection and presence detection. ESPHome also exposes distance, moving energy, and static energy as sensors, which means you can get crazy with automations.
Want your lights to turn on only if someone's moving around the room? You can do that. Want to detect the difference between someone walking past and someone sitting still? The data is there.
Over time, you might add a temperature sensor (DHT22, ~$2), a light sensor (BH1750, ~$1), or a CO2 sensor (MH-Z19B, ~$30). ESPHome supports all of these. Your simple presence sensor becomes a full environmental monitor.
Troubleshooting
If it's not detecting presence, first check that your wiring is solid. Use a multimeter to confirm VCC and GND are reaching the sensor properly. Then open the ESPHome logs and watch what the sensor is sending. You'll see UART data flowing if the connection is working.
If the logs show garbage data, you might have the baud rate wrong or the TX/RX pins swapped. Swap them back and reflash.
The LD2410B has a learning period of about 30 seconds when it starts up. During that time, it's calibrating to its environment. Don't panic if it's not detecting presence in the first minute after power-up.
The Real Value
Spending a weekend building this taught me more about how presence detection works than buying a finished product ever would. And now I've got a reliable sensor in my office for the price of a coffee.
If you're comfortable with a soldering iron and you've got Home Assistant running somewhere, this project is absolutely worth your time. You'll have a presence sensor that costs 75 percent less than the commercial alternative and does 80 percent of the job. That's a win in my book.